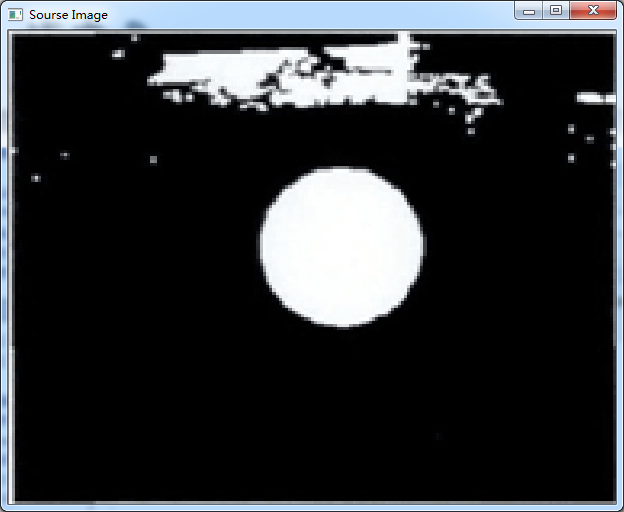
目标:提取下图中圆的位置、面积、长度
拿到这幅图像,首先肯定进行灰度化,不然后面没办法操作。
接着进行阈值化,把背景和前景区别开来。
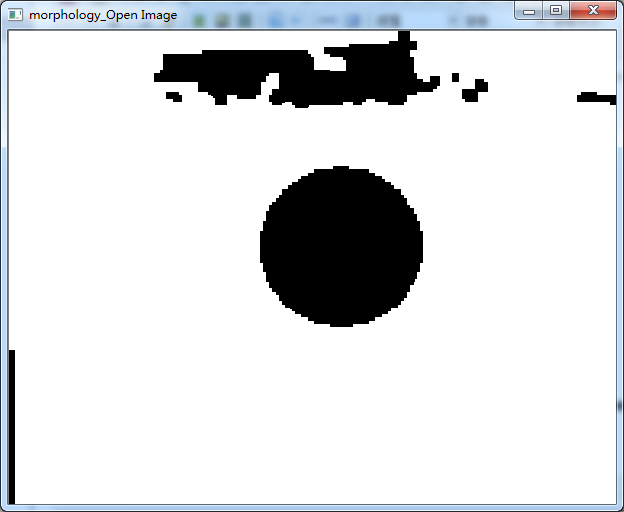
然后形态学操作,把小的斑点过滤掉,以免干扰,同时也为了让图像该分离的分离,该结合的结合。
最后又两种方法-->>1.霍夫变换求圆。2.边缘函数求圆。
二值化:

形态学操作:
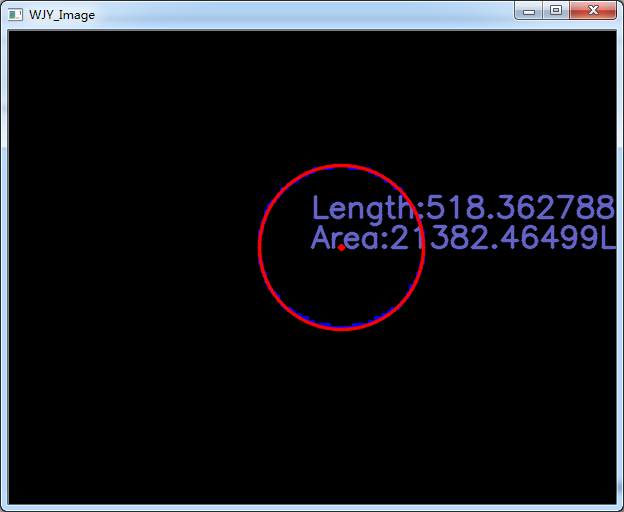
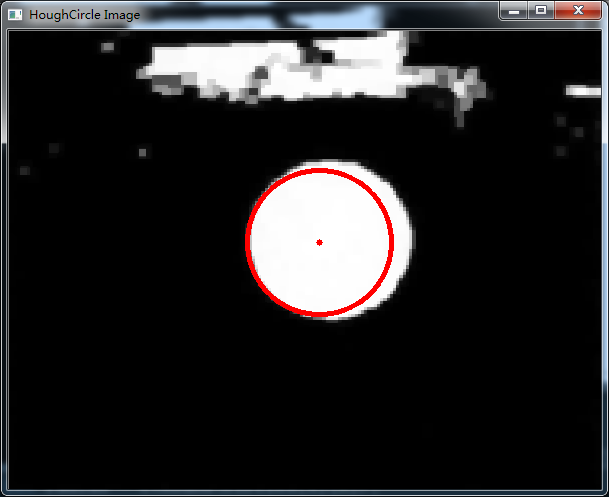
下面是进行基于边缘检测函数的方法--->>>>
手动计算的圆心、面积、周长:
自带函数计算的结果:
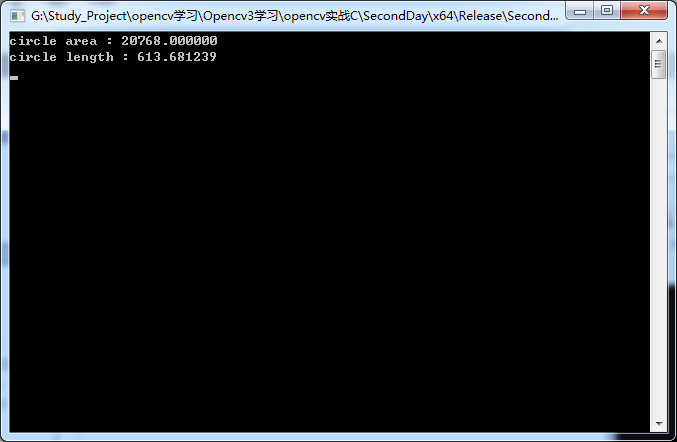
对比手动计算和库函数计算的结果,操作还是比较满意的,看上图画的圆已经和实际基本重合。
1 #define _CRT_SECURE_NO_WARNINGS 2 #include3 #include 4 #include 5 using namespace cv; 6 using namespace std; 7 8 RNG rng(12345); 9 10 Mat input_image, threshold_image, output_image, Middle_image;11 12 13 int main(int argc, char**argv)14 {15 input_image = imread("1.jpg");16 if (input_image.data == NULL) {17 return -1; cout << "can't open image.../";18 }19 imshow("Sourse Image", input_image);20 cvtColor(input_image, Middle_image,COLOR_RGB2GRAY);21 //imshow("Gray Image", Middle_image);22 threshold(Middle_image, Middle_image,0,255, THRESH_BINARY_INV| THRESH_OTSU);23 imshow("Threshold Image", Middle_image);24 Mat kernel = getStructuringElement(MORPH_RECT,Size(7,7),Point(-1,-1));25 //------------------------------清除小的杂质------------------------------//26 morphologyEx(Middle_image, Middle_image, MORPH_CLOSE,kernel,Point(-1,-1));27 //-------------连接小的区域为下面做准备,其实不操作这步也是可以的---------//28 morphologyEx(Middle_image, Middle_image, MORPH_OPEN, kernel, Point(-1, -1));29 imshow("morphology_Open Image", Middle_image);30 vector > contours;31 vector hierarchy;32 findContours(Middle_image,contours,hierarchy, RETR_TREE, CHAIN_APPROX_SIMPLE);33 Mat show_image = Mat::zeros(input_image.size(),input_image.type());34 for (size_t i = 0; i < contours.size(); i++)35 {36 //------清除太大和太小的区域--------//37 double Area = contourArea(contours[i]);38 if (Area > 100000) continue;39 if (Area < 10000) continue;40 //double length = arcLength(contours[i],1);41 //if (length < 500) continue;42 Rect temp = boundingRect(contours[i]);43 //------------特殊方法求圆-----------//44 float roti = (temp.width) / (temp.height);45 if (roti > 0.9&&roti < 1.1)46 {47 drawContours(show_image, contours, static_cast (i), Scalar(255, 0, 0), 2);48 int x = temp.x + temp.width / 2;49 int y = temp.y + temp.width / 2;50 printf("circle area : %f\n", Area);51 printf("circle length : %f\n", arcLength(contours[i], 0));52 //---------------手动计算圆位置、面积、长度----------//53 double WJY_Area = CV_PI*temp.width/2*temp.width/2;54 double WJY_Length = 2 * CV_PI*temp.width/2;55 char str_wjy_Area[15], str_wjy_Length[15];56 sprintf(str_wjy_Area, "Area:%3f", abs(WJY_Area));//把int--->>>String57 sprintf(str_wjy_Length, "Length:%3f", abs(WJY_Length));58 putText(show_image, str_wjy_Area, Point(x-30, y), FONT_HERSHEY_SIMPLEX, 1.0, Scalar(200, 100, 100), 2, 16);59 putText(show_image, str_wjy_Length, Point(x - 30, y-30), FONT_HERSHEY_SIMPLEX, 1.0, Scalar(200, 100, 100), 2, 16);60 circle(show_image,Point(x,y), temp.width / 2,Scalar(0,0,255),2, LINE_AA);//自己计算的圆61 circle(show_image, Point(x, y), 2, Scalar(0, 0, 255), 2, LINE_AA);//圆心62 } 63 }64 //------过滤小的片段,因为上面用了长度和面积都没过滤掉-------//65 //threshold(Middle_image, Middle_image, 200, 255, 0);66 imshow("FindContours Image", Middle_image);67 imshow("WJY_Image", show_image);68 69 waitKey(0);70 return 0;71 }
--->>>下面进行霍夫变换的方法--->>>
下面是经过很多次的参数调节得到的图:
当HoughCircles(Middle_image, circles, HOUGH_GRADIENT,1.5, 10, 200, 50);
下图所示:
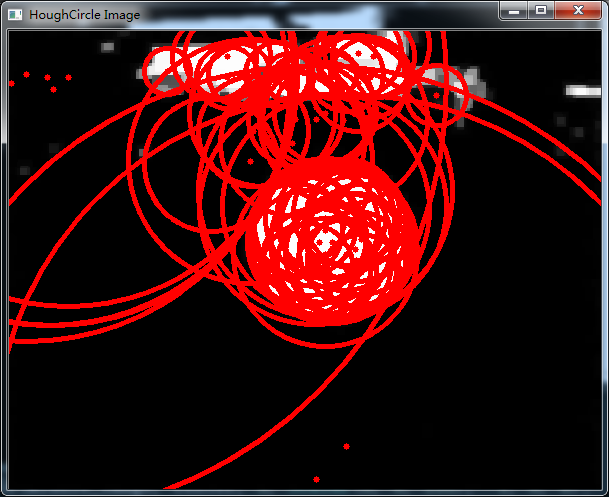
不仅效果不好,而且很难调节参数,我认为是我调节最好的了,而且前期也是经过形态学过滤,
==》》最可笑的是opencv官网对霍夫圆检测的一句话:
Usually the function detects the centers of circles well. However, it may fail to find correct radii. You can assist to the function by specifying the radius range ( minRadius and maxRadius ) if you know it. Or, you may ignore the returned radius, use only the center, and find the correct radius using an additional procedure。
大概意思就是,大部分情况检测的不好,要通过其它手段进行辅助,最好只是检测圆心。。。
注意:我想通过边缘检测对霍夫圆进行辅助操作,没想到这个API只能输入灰度图,二值图不能进行输入。。。爱莫能助
上一下代码:
1 int main(int argc, char**argv) 2 { 3 input_image = imread("2.jpg"); 4 if (input_image.data == NULL) { 5 return -1; cout << "can't open image.../"; 6 } 7 imshow("Sourse Image", input_image); 8 cvtColor(input_image, Middle_image, COLOR_RGB2GRAY); 9 imshow("Gray Image", Middle_image);10 11 Mat kernel = getStructuringElement(MORPH_RECT, Size(7, 7), Point(-1, -1));12 //------------------------------清除小的杂质------------------------------//13 morphologyEx(Middle_image, Middle_image, MORPH_CLOSE, kernel, Point(-1, -1));14 //-------------连接小的区域为下面做准备,其实不操作这步也是可以的---------//15 morphologyEx(Middle_image, Middle_image, MORPH_OPEN, kernel, Point(-1, -1));16 imshow("morphology_Open Image", Middle_image);17 vector circles;18 HoughCircles(Middle_image, circles, HOUGH_GRADIENT,19 1.5, 10, 200, 50);20 cvtColor(Middle_image, Middle_image, COLOR_GRAY2BGR);21 Mat show_image1 = Mat::zeros(input_image.size(), input_image.type());22 for (size_t i = 0; i < circles.size(); i++)23 {24 Point center(cvRound(circles[i][0]), cvRound(circles[i][1]));25 int radius = cvRound(circles[i][2]);26 // draw the circle center27 circle(Middle_image, center, 3, Scalar(0, 0, 255), -1, 8, 0);28 // draw the circle outline29 circle(Middle_image, center, radius, Scalar(0, 0, 255), 3, 8, 0);30 }31 imshow("HoughCircle Image", Middle_image);32 waitKey(0);33 return 0;34 } 参考:贾老师opencv系列